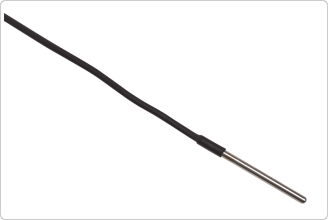
PRTs for laboratory freezers, autoclaves, and furnaces
- 5606: -200 °C to 160 °C
- Calibration accuracy of ± 0.05 °C
- Transition junction and lead wires can withstand full PRT temperature range
- Unique probe seal of 5606 prevents ingress of moisture
- Calibration not included; NVLAP-accredited calibration optional
The 5606 Full Immersion PRTs are designed to perform in extreme environments where both the transition junction and the lead wires are required to withstand temperatures covering the entire operating range of the probe. (“Immersion” in this case simply means exposure to temperatures other than ambient and does not necessarily refer to the medium to which the PRT and its components are subjected.)
Applications where “full immersion” of probe, transition junction, and lead wire is required can include calibration or validation of sensors used in laboratory or bio freezers, walk-in refrigerators, autoclaves, ovens, stability test chambers, furnaces or incubators. Other applications might include IQ/ OQ/PQ qualification procedures, temperature mapping, or data logging in temperature controlled spaces or environmental chambers.
| General Specifications |
| Temperature range |
|
| Nominal resistance at 0.01 °C |
|
| Temperature coefficient |
|
| Accuracy[1] |
| ± 0.04 °C at 0.01 °C |
| ± 0.06 °C at 160 °C |
|
| Short-term repeatability[2] |
| ± 0.03 °C at 0.01 °C |
| ± 0.04 °C at 160 °C |
|
| Drift[3] |
| ± 0.03 °C at 0.01 °C |
| ± 0.04 °C at 160 °C |
|
| Hysteresis |
|
| Sheath length |
| 50 mm ± 5 mm |
| (2 in ± 0.2 in) |
|
| Sheath diameter |
| 3.1 mm ± 0.1 mm (1/8 in ± 0.004 in) |
|
| Sheath material |
|
| Transition junction temperature range[4] |
|
| Sensor length |
| 30 mm ± 3mm (1.2 in ±0.1 in) |
|
| Sensor location |
| 3 mm ± 1 mm from tip (1.2 in ± 0.04 in) |
|
| Minimum insulation resistance |
|
| Minimum immersion length |
|
| Maximum immersion depth in liquid medium |
|
| Response time[5] |
|
| Self heating (in 0 °C bath) |
|
| Lead-wire cable type |
|
| Lead-wire length |
|
| Lead-wire temperature range |
|
| Calibration |
| Calibration not included. NVLAP accredited calibration available. See ordering information. |
|
[1] Includes calibration and 100 hr drift (k = 2).
[2] Three thermal cycles from min to max temp, includes hysteresis, 95 % confidence (k = 2).
[3] After 100 hours at max temp, 95 % confidence (k = 2).
[4] Temperatures outside this range will cause irreparable damage.
[5] Per ASTM E 644.
| Calibration uncertainty |
|
|
5606 |
| Temperature |
1924 Calibration Uncertainty† |
Tolerance w/out Calibration‡ |
| -197 °C |
0.03 °C |
0.4 °C |
| -38 °C |
0.03 °C |
0.2 °C |
| 0 °C |
0.03 °C |
0.1 °C |
| 100 °C |
0.045 °C |
0.3 °C |
| 157 °C |
0.05 °C |
0.4 °C |
|
|
|
|
† Lab code 200348-0
‡ Each PRT includes a certificate with a measured R0 value.
An uncalibrated 5606 meets ASTM E 1137 Grade A Classification of Tolerances. Use the coefficients below to achieve the tolerances listed in the “No Calibration” column or calculate the Grade A tolerance using the following formula: Grade A = ± [0.13 + 0.0017|t|]°C where: |t| = value of temperature (°C) without regard to sign. See ASTM E 1137.
R0: Enter the R0 value provided
A: 3.9083 x 10⁻³
B: –5.775 x 10⁻⁷
C: –4.183 x 10⁻¹² |


